
Waterdrop filters offer advanced filtration solutions for clean drinking water. Their systems‚ including reverse osmosis and under-sink models‚ effectively remove contaminants‚ improving taste and odor‚ while being eco-friendly and easy to install.
1;1 Overview of Waterdrop Filter Systems
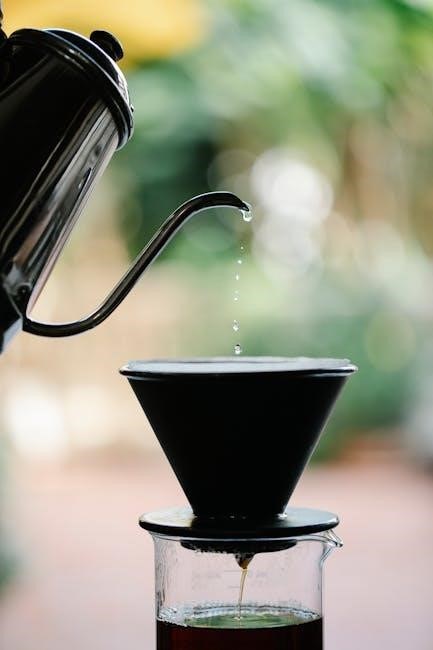
Waterdrop filter systems are designed to provide clean and safe drinking water through advanced filtration technology; They offer a range of models‚ including reverse osmosis (RO) systems‚ under-sink filters‚ and pitcher-style dispensers. These systems are known for their compact design‚ ease of installation‚ and high-efficiency filtration. The Waterdrop CoreRO‚ for example‚ features a 5-stage filtration process that includes a PP cotton layer and an RO membrane to remove impurities like lead‚ chlorine‚ and heavy metals. Other models‚ such as the Waterdrop X16‚ use an 11-stage filtration process with a reinforced RO membrane for superior water quality. Many systems are NSF/ANSI certified‚ ensuring they meet rigorous safety standards. Waterdrop filters are also environmentally friendly‚ with some models reducing water waste by up to 300% compared to traditional systems. Their tankless designs and smart filter replacement indicators make them a convenient choice for homeowners.
1.2 Benefits of Using Waterdrop Filters
Waterdrop filters provide numerous benefits for improving water quality and user convenience. They effectively remove contaminants like lead‚ chlorine‚ and heavy metals‚ enhancing the taste and odor of drinking water. Many systems are NSF/ANSI certified‚ ensuring they meet strict safety and performance standards. Waterdrop filters are also eco-friendly‚ with some models reducing water waste by up to 300% compared to traditional systems. Their compact and tankless designs save space and make installation easier. Additionally‚ features like smart filter replacement indicators ensure optimal performance and maintenance. These systems are designed for DIY installation‚ making them a hassle-free solution for homeowners. Overall‚ Waterdrop filters offer a reliable‚ efficient‚ and environmentally conscious way to access clean and safe drinking water.
Pre-Installation Guide
- Gather necessary tools and materials‚ such as wrenches and adapters.
- Shut off the water supply to prevent leaks during installation.
- Prepare the faucet and water supply lines according to system requirements.
2.1 Tools and Materials Needed
Before starting the installation‚ ensure you have the necessary tools and materials. Commonly required items include an adjustable wrench‚ bucket or container‚ towels‚ screwdrivers‚ and Teflon tape for securing connections. Additionally‚ a drill may be needed for mounting the filter system. Ensure all components provided with the Waterdrop filter are included‚ such as inlet hoses‚ adapters‚ and fittings. If your faucet has a unique connection size‚ adapters like 3/8″ or 1/2″ converters may be necessary. Having replacement filters on hand is also recommended for future use. Always refer to the specific model’s manual for exact requirements‚ as some systems may need additional hardware. Proper preparation ensures a smooth and efficient installation process.
2.2 Shutting Off the Water Supply
Before beginning the installation‚ it is crucial to shut off the water supply to prevent any leaks or water damage. Locate the shut-off valves connected to the cold and hot water supply lines under the sink. Turn both valves clockwise until they stop‚ ensuring the water supply is completely cut off. Open the faucet to drain any remaining water in the lines. For some systems‚ such as the Waterdrop G3P800‚ the manual may specify additional steps‚ like turning off the main water supply valve for the entire house if needed. Verify that the water flow has stopped before proceeding with the installation. This step ensures a safe and dry working environment while installing your Waterdrop filter system.
2.3 Preparing the Faucet and Water Supply Lines
After shutting off the water supply‚ prepare the faucet and water supply lines for installation. Remove any existing aerators or adapters from the faucet to ensure a smooth connection. Inspect the supply lines for any damage or corrosion and replace them if necessary. For systems like the Waterdrop TSA-10‚ align the inlet hose with the cold water valve‚ ensuring compatibility. If the valve outlet is 3/8 inches‚ it can be directly connected. For 1/2-inch outlets‚ use a No.1 converter as specified. Securely attach the hoses to the faucet and filter head‚ ensuring they are not twisted or kinked. Proper preparation ensures a leak-free and efficient connection during the installation process.
Installation Steps
Install the Waterdrop filter by connecting the water supply lines‚ mounting the filter housing‚ and securing the tubing. Flush the system thoroughly to ensure proper function and check for leaks.
3.1 Connecting the Water Supply
Connecting the water supply is the first step in installing your Waterdrop filter system. Start by shutting off the cold water supply to prevent any water flow during installation. Use an adjustable wrench to disconnect the faucet hose from the existing water supply line. Remove any adapters or fittings already in place. For systems requiring a 3/8″ connection‚ directly attach the inlet hose to the cold water valve. If your valve has a 1/2″ outlet‚ use the provided No.1 converter for a secure fit. Ensure the hoses are properly aligned and seated to avoid leaks. Wrap Teflon tape around the threads of the valve to create a watertight seal. Once connected‚ slowly turn on the water supply to check for leaks. This step ensures a stable water source for the filtration process. Proper connection is essential for optimal system performance.
3.2 Installing the Filter Housing
Installing the filter housing is a crucial step in setting up your Waterdrop filtration system. Begin by locating a suitable spot for the housing‚ ideally near the water supply line and under the sink. Use the provided screws to mount the housing to the wall or cabinet‚ ensuring it is secure and level. Position the housing at least 2 inches above the ground to facilitate easy filter replacements. Once mounted‚ attach the inlet and outlet hoses to the housing‚ ensuring they are securely connected. Tighten all fittings by hand or with a wrench to avoid over-tightening. Finally‚ check the housing for any leaks by gently turning on the water supply. Proper installation ensures the system operates efficiently and maintains water quality. This step is foundational for the entire filtration process.
3.3 Mounting the Filter Head
Mounting the filter head securely is essential for the proper functioning of your Waterdrop filtration system. Start by identifying a suitable location for the filter head‚ typically near the water supply lines under the sink. Use the provided mounting screws to attach the head to a sturdy surface‚ ensuring it is level and stable. Align the filter head with the housing to ensure proper connection. Once mounted‚ connect the tubing from the filter housing to the head‚ making sure the hoses are correctly aligned and securely fitted. Tighten all connections by hand or with a wrench to prevent leaks. After mounting‚ double-check the alignment and connections to ensure everything is properly seated. Proper installation of the filter head ensures smooth water flow and optimal filtration performance. This step is critical for the system’s efficiency and longevity.
3.4 Connecting the Tubing
Connecting the tubing is a critical step in the Waterdrop filter installation process. Begin by cutting the tubing to the desired length using a sharp utility knife or tubing cutter. Ensure the tubing is free from debris and burrs. Insert one end of the tubing into the quick-connect fitting on the filter head‚ ensuring it is fully seated. Repeat this process for the other end of the tubing‚ connecting it to the designated port on the filter housing or faucet. Gently pull the tubing to confirm it is securely attached. If using 1/4″ tubing‚ verify compatibility with the system’s connections. Properly aligned and tightly connected tubing ensures uninterrupted water flow and prevents leaks. Always follow the manufacturer’s guidelines for tubing length and type to maintain optimal system performance and longevity.
3.5 Flushing the System

Flushing the Waterdrop filter system is essential after installation to remove any debris and ensure optimal performance. Turn on the cold water supply and allow the water to flow through the system for 5 to 10 minutes. This process cleanses the filters and prepares them for use. During flushing‚ you may notice cloudy or discolored water‚ which is normal due to trapped air and particles being released. After flushing‚ check for any leaks in the connections. If leaks are detected‚ tighten the connections and flush the system again. Proper flushing ensures the filters function efficiently and provides fresh‚ clean water. Regular flushing also helps maintain the system’s longevity and prevents clogging. Always refer to the manufacturer’s instructions for specific flushing times and procedures tailored to your Waterdrop model.
3.6 Checking for Leaks
After completing the installation and flushing the system‚ it’s crucial to check for any leaks to ensure proper function and prevent water damage. Start by turning on the cold water supply and inspect all connections‚ including the filter housing‚ tubing‚ and faucet links. Look for water droplets‚ puddles‚ or signs of moisture. If a leak is detected‚ turn off the water supply immediately. For threaded connections‚ apply Teflon tape to the threads and tighten them securely. For push-to-connect fittings‚ ensure the tubing is fully inserted and the locking sleeves are engaged. If leaks persist‚ replace any worn-out washers or O-rings. Regular leak checks help maintain water efficiency and prevent potential damage to your system or countertops. Always follow the manufacturer’s recommendations for specific leak-prevention tips tailored to your Waterdrop model.
Maintenance and Replacement
Regular maintenance ensures optimal performance and longevity of your Waterdrop filter system. Replace filters as recommended‚ typically every 12 months‚ and clean or sanitize components periodically to maintain efficiency and water quality.
4.1 Cleaning the Inlet Filter
Cleaning the inlet filter is a straightforward process that helps maintain water flow and system efficiency. Start by turning off the water supply to prevent any leakage. Locate the inlet filter‚ typically found at the entry point of the water supply line. Gently remove the filter by unscrewing or releasing the clips holding it in place. Rinse the filter under clean water to remove accumulated debris and sediment. For tougher buildup‚ use a soft brush to scrub the filter surface without damaging the material. Avoid using harsh chemicals to prevent degradation. Once cleaned‚ allow the filter to air dry to prevent mold growth. Reinstall the filter securely‚ ensuring all connections are tight. Finally‚ turn the water supply back on slowly to check for leaks. Regular cleaning every few months or as needed ensures optimal performance and prevents reduced water flow. If the filter is damaged‚ replace it immediately to maintain filtration effectiveness.
4.2 Replacing the Filter Cartridges
To replace the filter cartridges in your Waterdrop system‚ begin by turning off the water supply and releasing any remaining pressure in the lines. Locate the filter housing and remove the protective cap or clips securing the cartridge. Gently pull out the old cartridge and discard it responsibly. Take the new cartridge‚ ensuring it’s compatible with your system‚ and align it with the housing. Insert the new cartridge firmly until it clicks into place. Replace the housing cap or clips securely. Turn the water supply back on slowly to avoid sudden pressure spikes. Flush the system by running water for 5-10 minutes to remove any residual debris or air bubbles. Check for leaks at all connections. Regular replacement ensures optimal filtration performance and water quality. Always refer to the manufacturer’s guidelines for specific cartridge replacement intervals and disposal instructions.
4.3 Sanitizing the System
Sanitizing your Waterdrop filter system is essential to maintain cleanliness and prevent the growth of bacteria or mold. Start by turning off the water supply and draining the system. Mix a solution of 1 tablespoon of unscented chlorine bleach with 1 gallon of water. Pour this mixture into the filter housing and allow it to circulate through the system for about 30 minutes. After sanitizing‚ flush the system thoroughly by running water through the faucet for 10-15 minutes to remove any traces of bleach. Repeat if you notice any residual taste or odor. For alternative methods‚ you can use food-grade vinegar or specialized water filter sanitizing solutions. Always wear gloves and ensure the system is completely flushed before resuming use. Regular sanitizing ensures your system remains safe and effective for clean drinking water. Follow the manufacturer’s recommendations for frequency and methods.

Troubleshooting Common Issues
Identify and resolve issues like leaks‚ low water pressure‚ or high TDS levels by checking connections‚ replacing worn-out parts‚ and ensuring proper installation. Regular maintenance prevents most problems.

5.1 No Water Flow or Low Water Pressure
If your Waterdrop filter system is experiencing no water flow or low water pressure‚ there are several potential causes to investigate. First‚ check if the water supply is fully turned on and not restricted. Ensure all connections are secure and not loose‚ as this can disrupt water flow. Next‚ inspect the filters for blockages or excessive wear‚ as dirty or clogged filters can significantly reduce water pressure. If the system has recently been installed‚ verify that the tubing is not kinked or twisted‚ which can impede water flow. Additionally‚ ensure the faucet aerator is clean‚ as mineral buildup can restrict water pressure. If the issue persists‚ consult the user manual or contact customer support for further assistance. Regular maintenance and filter replacement can help prevent such problems.
5.2 Leaks in the System
Leaks in the Waterdrop filter system can occur due to improper connections or worn-out components. First‚ inspect all connections‚ including the filter housing‚ tubing‚ and faucet connections‚ for any signs of moisture or water droplets. Tighten any loose connections using a wrench‚ ensuring not to overtighten‚ which could damage the threads. Apply Teflon tape to threaded connections for a watertight seal. If leaks persist‚ check the hoses for kinks or blockages and ensure they are properly aligned with the fittings. Additionally‚ inspect the O-rings or gaskets for signs of wear and replace them if necessary. If a leak occurs at a quick-connect fitting‚ press the lock sleeve and pull the tubing out to inspect and clean the connection. Always turn off the water supply before attempting repairs to avoid further water damage.
5.3 High TDS Levels After Filtration
High TDS (Total Dissolved Solids) levels after filtration can indicate issues with the Waterdrop filter’s performance. This may occur if the filter cartridges are worn out or not replaced on schedule. Check the filter life indicator or replace the cartridges if they’ve exceeded their recommended lifespan. Ensure the system is installed correctly‚ as improper connections or bypassing the filter stages can allow unfiltered water to pass through. Additionally‚ if the incoming water has exceptionally high TDS‚ the filter may not be designed to handle such levels‚ requiring a more advanced filtration solution. Finally‚ inspect the RO membrane for damage or fouling‚ as it plays a critical role in reducing TDS. Always refer to the user manual for specific guidance on addressing TDS issues for your model.

Additional Features and Tips
Waterdrop filters include smart replacement indicators‚ ensuring timely cartridge changes. Remineralization filters can be added for enhanced taste. Regular maintenance and proper installation maximize efficiency‚ optimizing water quality and system longevity.
6.1 Remineralization Filter Installation
Installing a remineralization filter enhances water quality by reintroducing beneficial minerals. For the Waterdrop WD-G3P800-W‚ use the MNR35 remineralization filter. Connect it using 1/4-inch tubing‚ compatible with most RO systems. Follow the tubing connection steps in the system’s installation guide. Mount the filter securely‚ ensuring proper flow direction. After installation‚ flush the system thoroughly to remove any debris. Regularly check the filter for mineral depletion and replace as needed. This step improves water taste and mineral content‚ making it ideal for those seeking enhanced hydration. Ensure the system is connected to cold water only and avoid exposing it to direct sunlight or harmful chemicals for optimal performance.
6.2 Smart Filter Replacement Indicators
Waterdrop systems feature smart filter replacement indicators‚ ensuring timely cartridge swaps. These indicators monitor filter life and notify users when replacement is needed. For models like the G3P800‚ the indicator tracks usage and contamination levels. When the filter nears its capacity‚ the system alerts users via a color-coded display or mobile app. This feature prevents inefficient filtration and maintains water quality. The indicator also guides users through the replacement process‚ minimizing downtime. Regular updates ensure accuracy‚ and the system resets automatically after installing new filters. This intelligent feature simplifies maintenance‚ ensuring clean drinking water consistently. It’s a convenient solution for busy households‚ eliminating guesswork and enhancing overall system performance. Always refer to the user manual for specific instructions tailored to your Waterdrop model.
6.3 Water Efficiency and Conservation Tips
Waterdrop systems are designed with water efficiency in mind‚ minimizing waste while delivering clean water. For instance‚ the Waterdrop G3P800 reduces water waste by 300% compared to traditional systems. To conserve water‚ always fix leaks promptly and consider installing low-flow fixtures. Regularly monitoring your water usage through the system’s app or dashboard can also help identify areas for improvement. Additionally‚ smart sensors detect water flow and automatically shut off the system when not in use‚ preventing unnecessary waste. For further efficiency‚ clean or replace filters as needed to maintain optimal water flow. These practices not only reduce your water bill but also minimize environmental impact while ensuring access to high-quality drinking water.
Waterdrop filters provide clean‚ fresh water with efficient filtration and easy maintenance. Their innovative designs ensure optimal performance while promoting water conservation and sustainability in your home.
7.1 Final Check and System Optimization
After installation‚ conduct a final check to ensure all connections are secure and no leaks are present. Flush the system thoroughly to remove any impurities. Check the water flow and pressure to confirm optimal performance. Monitor the TDS levels to verify the filtration effectiveness. Ensure the filter replacement indicators are functioning correctly. Regularly inspect and clean the inlet filter to maintain efficiency. Refer to the user manual for specific maintenance recommendations. Proper system optimization ensures long-term reliability and high-quality water output.