
Sculpey Oven Bake Clay is a versatile, easy-to-use polymer clay designed for crafting intricate sculptures and designs. Perfect for beginners and experienced crafters, it bakes in a home oven at 275°F (135°C) for 15-30 minutes, depending on thickness. This durable, long-lasting material is ideal for creating jewelry, ornaments, and decorative items, offering endless creative possibilities.
What is Sculpey Oven Bake Clay?
Sculpey Oven Bake Clay is a high-quality polymer clay designed for crafting and baking in a home oven. It is a pliable, non-toxic material that hardens when baked at 275°F (135°C) for 15-30 minutes, depending on thickness. Known for its durability and vibrant colors, Sculpey clay is ideal for creating jewelry, ornaments, miniatures, and decorative items. It is easy to shape, blend, and customize, making it a favorite among crafters of all skill levels. Once baked, it becomes a long-lasting, professional-grade finish suitable for various artistic applications.
Popular Uses of Sculpey Clay
Sculpey Oven Bake Clay is a versatile material with a wide range of creative applications. It is commonly used for making jewelry, decorative ornaments, miniatures, and custom embellishments. Crafters also use it to create intricate sculptures, charms, and personalized gifts. The clay is ideal for home decor projects, such as coaster sets or wall art, and can be molded into functional items like buttons or beads. Its ease of use and durability make it a favorite for both beginners and experienced crafters, allowing for endless artistic expression and practical creations.
Why Choose Sculpey Oven Bake Clay?
Sculpey Oven Bake Clay is a top choice for crafters due to its ease of use and professional results. It is durable, long-lasting, and offers vibrant colors that retain their brightness after baking. The clay is soft and pliable, making it easy to shape and mold. Its ability to bake in a home oven at 275°F (135°C) simplifies the curing process. Additionally, Sculpey clay is kid-friendly, making it ideal for family projects. Its versatility, safety, and high-quality finish make it a preferred choice for both beginners and experienced crafters seeking reliable and artistic outcomes.
Materials and Tools Needed
Oven, silicone mat, rolling tools, shaping tools, cutters, sandpaper, and sealants are essential for working with Sculpey Oven Bake Clay to ensure smooth and professional results.
Essential Tools for Working with Sculpey Clay
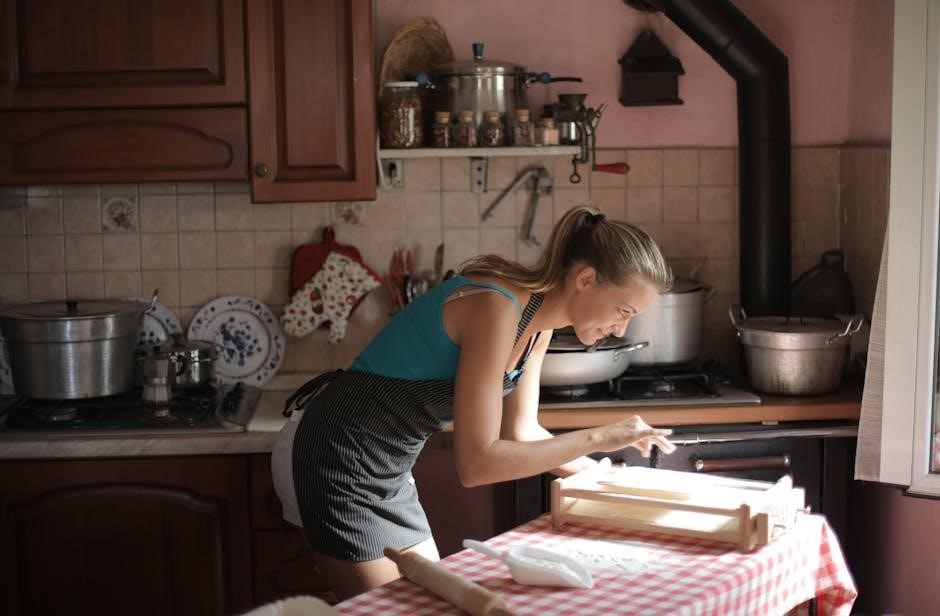
Working with Sculpey Oven Bake Clay requires a few essential tools to achieve professional results. A silicone mat or wax paper is crucial for preventing the clay from sticking to surfaces. Rolling tools, such as a pasta machine or rolling pin, help in achieving uniform thickness. Cutters, like sharp blades or cookie cutters, are ideal for shaping designs. Additionally, toothpicks or modeling tools can add textures and patterns. Sandpaper is useful for smoothing edges after baking. Lastly, gloves and goggles ensure safe handling during the process.
Recommended Surfaces for Baking
For baking Sculpey Oven Bake Clay, a silicone mat or parchment paper is highly recommended, as they prevent sticking and ensure even heating. A ceramic tile or glass surface also works well, but avoid metal surfaces, as they can cause uneven baking. Some crafters use cardboard, but it must be clean and sturdy to support the clay without warping. Always preheat your oven with the clay on the chosen surface to ensure proper adhesion and avoid shifting during baking. Clean up is easier with a surface that can withstand heat and clay residue.
Important Safety Gear
When working with Sculpey Oven Bake Clay, essential safety gear includes heat-resistant gloves for handling hot items from the oven and protective goggles to prevent eye irritation from clay particles. Ensure proper ventilation to avoid inhaling fumes during baking. Use an oven thermometer to maintain accurate temperatures, and keep a fire extinguisher nearby as a precaution. Avoid wearing loose clothing near the oven, and keep children and pets at a safe distance. Always follow the manufacturer’s guidelines to ensure a safe crafting experience.

Preparing the Clay
Preparing Sculpey Oven Bake Clay involves softening and conditioning the clay for easy manipulation. Knead the clay until pliable, then mix colors or add textures as desired.
Softening the Clay for Easy Handling
Sculpey Oven Bake Clay can be softened by kneading it gently with your hands or using a pasta machine. If the clay is too firm, warm it slightly by placing it in a plastic bag and letting it sit in a warm environment. Avoid overheating, as this can cause the clay to become too sticky. Once softened, the clay becomes pliable and ready for shaping and molding. Proper conditioning ensures a smooth and enjoyable crafting experience.
Mixing and Blending Colors
Sculpey Oven Bake Clay comes in a variety of vibrant colors that can be mixed to create custom shades. To blend colors, knead two or more pieces of clay together until the desired hue is achieved. Use a pasta machine to mix evenly or layer clays for marbled effects. Start with small amounts to test the color, adjusting as needed. Adding white or black clay can lighten or darken the shade. Avoid overmixing, as it may create a muddy appearance. The color will remain vibrant after baking, ensuring your creations look stunning and professional.
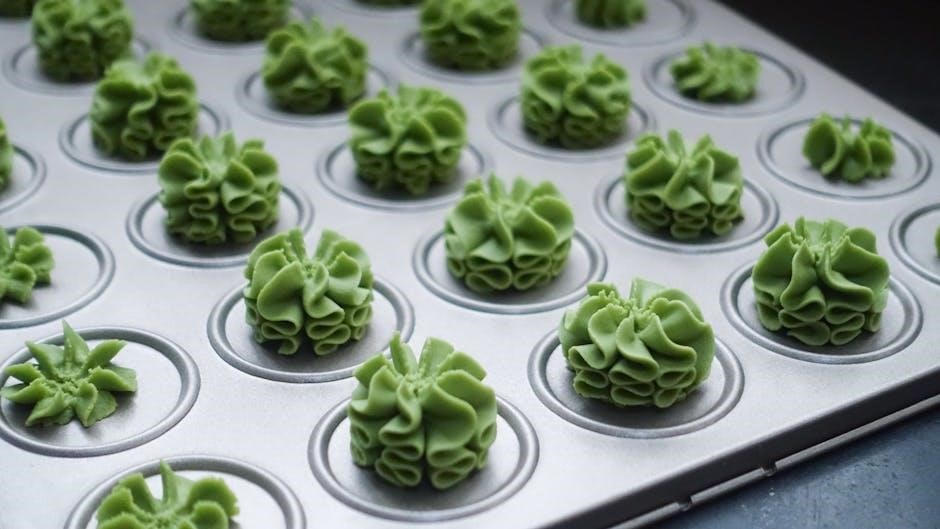
Creating Patterns and Textures
To add unique patterns and textures to your Sculpey creations, experiment with various tools like toothpicks, texture mats, or household items such as fabric or leaves. Gently press the tool into the clay to create intricate designs. For layered effects, roll out thin sheets of different colors and stack them, then cut or shape as desired. Textures can also be achieved by embedding small objects like beads or glitter into the clay. Once baked, the patterns and textures will remain permanent, adding depth and visual interest to your finished pieces. This step allows for endless creative expression and customization.
Baking Instructions
Preheat your oven to 275°F (135°C). Bake Sculpey clay for 15-30 minutes per 1/4 inch thickness. Never use a microwave for baking.
Preheating the Oven
Preheating your oven to the correct temperature is crucial for baking Sculpey Oven Bake Clay. Set your oven to 275°F (135°C) and ensure it reaches this temperature before placing your clay pieces inside. Use an oven thermometer to verify accuracy, as proper heat ensures even curing. Allow the oven to preheat for at least 10-15 minutes to maintain consistent heat distribution. Never skip this step, as improper preheating can lead to undercooked or unevenly baked pieces.
Baking Temperature and Time Guidelines
Bake Sculpey Oven Bake Clay at 275°F (135°C) for optimal results. The baking time depends on the thickness of your piece—bake for 15 minutes per 1/4 inch of thickness. For example, a piece measuring 1/2 inch thick requires 30 minutes. Always preheat the oven before placing your clay inside. Use an oven thermometer to ensure accuracy, as incorrect temperatures can affect curing. Avoid overbaking, as it may cause discoloration or brittleness. Follow these guidelines for a perfectly cured finish every time.
Estimating Thickness for Proper Baking
Accurately measuring the thickness of your Sculpey project is crucial for proper baking. Use a ruler or caliper to determine the thickest part of your piece. Bake at 275°F (135°C) for 15 minutes per 1/4 inch of thickness. For example, a 1/2-inch-thick piece requires 30 minutes. Always check the thickest area to ensure even curing. Underestimating thickness can lead to underbaked clay, while overestimating may cause brittleness. Measure carefully to achieve the perfect bake and a durable finish for your creations.
Avoiding Common Baking Mistakes
To avoid common baking mistakes with Sculpey Oven Bake Clay, ensure your oven is preheated to 275°F (135°C) before placing your piece inside. Never bake in a microwave, as this can cause uneven curing or burning. Avoid overcrowding the baking surface, as pieces may stick together. Use a silicone mat or parchment paper for even heat distribution. Don’t open the oven during baking, as sudden temperature changes can cause cracks. After baking, allow pieces to cool completely on a heat-resistant surface before handling. Proper cooling prevents warping and ensures a sturdy finish. Always follow recommended baking times to achieve professional results.
Cooling and Handling After Baking
Allow baked pieces to cool completely on a heat-resistant surface. Avoid sudden movements to prevent cracking. Handle cooled items gently to maintain their shape and integrity.
Proper Cooling Techniques
After baking, allow Sculpey pieces to cool on a heat-resistant surface, such as a ceramic tile or silicone mat, away from drafts. Do not immerse in water immediately, as sudden temperature changes can cause cracking. Let pieces cool completely before handling to ensure stability and avoid warping. Avoid stacking items while cooling, as this can create pressure points. Once cooled, gently inspect the pieces for any imperfections or weak spots. Proper cooling ensures durability and maintains the integrity of your creations.
Handling Baked Pieces Safely
Always let baked Sculpey pieces cool completely before handling to avoid damage or warping. Use gloves or a soft cloth to prevent fingerprints and skin oils from transferring to the clay. Avoid applying force or pressure, as baked pieces can be fragile. Store cooled items in a dry, protected area to prevent moisture exposure. Handle with care to avoid chipping or cracking, especially around thin or delicate areas. Proper handling ensures your creations remain intact and ready for further finishing or display.
Finishing Touches
After baking, enhance your creations with sanding for smooth edges, painting for vibrant colors, and sealing to protect and add shine, ensuring a professional finish.
Sanding and Smoothing Edges
Sanding is essential for achieving smooth, professional-looking edges on Sculpey creations. Start with medium-grit sandpaper (220-320) to remove rough spots, then progress to finer grits (600-800) for polishing. Always sand in one direction to avoid scratches. For intricate areas, use a small, flat sanding tool or a sanding block for even surfaces. Lightly dampen the sandpaper with water to reduce dust and prevent clogging. Be patient and gentle to avoid altering the shape or thinning the clay excessively. This step ensures a clean, polished finish before painting or sealing.
Painting and Sealing Your Creations
After baking and cooling, enhance your Sculpey pieces with acrylic paints for vibrant colors. Allow each coat to dry completely before adding additional layers. For a glossy finish, apply a clear acrylic spray or varnish, following the product’s instructions. Multiple thin coats are better than one thick layer to avoid pooling. To protect your artwork, ensure the sealer is fully dry before handling. This step adds durability and preserves the colors, making your creations ready for display or use. Proper sealing ensures your pieces remain vibrant and long-lasting.
Adding Embellishments
Enhance your Sculpey creations by adding embellishments like beads, sequins, or small findings. Embed these items into the clay before baking for a seamless look, or attach them afterward using a strong adhesive. For intricate details, use paint pens or markers to add patterns or textures. Experiment with mixed media by incorporating fabric, paper, or metal elements. Properly secure all embellishments to ensure durability. This step allows for personalization, making each piece uniquely yours. Embellishments add dimension and character, elevating your artwork to a professional finish.
Troubleshooting Common Issues
Fixing Uneven Baking
To address uneven baking, ensure the oven preheats correctly and use a thermometer for accuracy. Avoid overcrowding the baking surface and rotate pieces midway for even results.
Uneven baking can occur due to incorrect oven temperature or uneven clay thickness. To fix this, ensure your oven is preheated to 275°F (135°C) and use a thermometer for accuracy. Bake pieces in a single layer on a heat-resistant surface, avoiding overcrowding. Rotate the baking sheet halfway through the baking time to promote even heating. If underbaked areas are noticed, return the piece to the oven for a few more minutes. For overbaked spots, lightly sand the area after cooling. Always follow the recommended baking time of 15-30 minutes based on thickness for optimal results.
Repairing Cracks or Breaks
To repair cracks or breaks in baked Sculpey pieces, start by lightly sanding the affected areas to smooth them. Apply a small amount of Sculpey Bake & Bond adhesive or Liquid Sculpey to the broken edges. Reattach the pieces, ensuring they align properly. Bake the entire piece in a preheated oven at 275°F (135°C) for 10-15 minutes to reinforce the bond. For larger breaks, reinforce with a thin layer of raw clay over the crack before baking. This method restores structural integrity and blends repairs seamlessly with the original design.
Project Ideas
Sculpey Oven Bake Clay is perfect for creating custom jewelry, decorative ornaments, and miniatures. Try making personalized charms, intricate pendants, or detailed home decor items. Ideal for beginners and experienced crafters alike, Sculpey allows for endless creativity and experimentation with colors and textures.
Simple Projects for Beginners
Start with easy projects like making simple jewelry, mini ornaments, or charms. Roll out the clay, cut shapes with cookie cutters, or mold by hand. Bake at 275°F for 15-30 minutes, depending on thickness. Paint and seal after cooling for a professional finish. Try creating personalized keychains, bead bracelets, or decorative magnets. These projects are great for practicing color mixing and texture techniques. Store leftover clay in a cool, dry place for future use. Perfect for crafters of all skill levels, these small projects build confidence and skill.
Intermediate and Advanced Designs
For intermediate and advanced crafters, Sculpey Oven Bake Clay offers opportunities to create intricate sculptures, layered designs, and detailed miniatures. Experiment with blending colors, texture stamping, and intricate patterns. Try crafting complex jewelry pieces, figurines, or home decor items. Advanced techniques include layering clay for dimensional effects and incorporating mixed-media elements like beads or fabric. To achieve professional results, use a silicone surface for even baking and avoid overheating. Gradually increase oven temperature to prevent cracking. Proper cooling and post-bake treatments like painting or sealing enhance durability and appearance, making your creations truly exceptional.
Safety Precautions
Ensure proper ventilation when working with Sculpey Oven Bake Clay. Avoid overheating, as it may release fumes. Use gloves to protect skin and keep children away from sharp tools and hot ovens.
General Safety Tips
When working with Sculpey Oven Bake Clay, always prioritize your safety. Ensure good ventilation in your workspace to avoid inhaling fumes during baking. Avoid overheating the clay, as it can release harmful substances. Keep sharp tools and hot ovens out of children’s reach. Use gloves to protect your skin from potential irritation. Never bake clay in a microwave, as it can cause uneven heating and damage. Follow the recommended temperature and baking times to prevent accidents and ensure optimal results. Store leftover clay in a cool, dry place to maintain its quality.
Working with Children
Engaging children with Sculpey Oven Bake Clay can be a fun and educational experience, but proper supervision is essential. Ensure kids understand the importance of safety, especially around hot ovens and sharp tools. Teach them to handle clay gently to avoid breaking their creations. Demonstrate how to preheat the oven safely and explain the baking process. Encourage creativity while emphasizing the need to follow instructions closely. Adult assistance is recommended when handling the oven to prevent accidents. This collaborative approach fosters learning and enjoyment while ensuring a safe crafting environment for all participants.
Ventilation and Workspace Safety
Proper ventilation and a safe workspace are crucial when working with Sculpey Oven Bake Clay. Always craft in a well-ventilated area to prevent inhaling dust or fumes during baking. Keep your workspace clean and stable to avoid accidents. Use a heat-resistant surface, like a silicone mat or parchment paper, to protect your work area from heat damage. Ensure no flammable materials are near the oven. Store sharp tools and baking supplies securely, especially if children are present. Maintaining a safe and organized workspace ensures a enjoyable and risk-free crafting experience.
Storage and Maintenance
Store unused Sculpey Oven Bake Clay in a cool, dry place, away from direct sunlight. Use airtight containers to maintain freshness. Baked pieces are durable and long-lasting, requiring minimal care. Protect them from harsh chemicals or extreme temperatures to preserve their integrity and appearance.
Storing Unused Clay
Store unused Sculpey Oven Bake Clay in a cool, dry area to maintain its pliability. Keep it away from direct sunlight and moisture to prevent drying out. Use airtight containers or plastic bags to store leftover clay, ensuring it remains fresh for future projects. Proper storage helps preserve the clay’s quality and ensures it remains easy to work with when you’re ready to create again. Always check the clay for any signs of spoilage before reuse.
Caring for Baked Pieces
Baked Sculpey pieces are durable but require proper care to maintain their appearance. Handle them gently to avoid cracking or breaking. For added protection, seal with a clear varnish or resin. Avoid exposing baked pieces to extreme temperatures or moisture. Clean them with a soft cloth and mild soap if necessary. Store in a dry, cool place away from direct sunlight to preserve color vibrancy. For delicate items, consider padding with felt or cloth to prevent scratches. Regular maintenance ensures your creations remain vibrant and intact for years to come.
Additional Tips and Tricks
For professional results, bake on a silicone surface at 275°F for 45 minutes, then sand in ice water for a smooth finish.
Using Adhesives and Sealants
For a strong bond between baked Sculpey pieces, use Sculpey Clay Adhesive or a high-quality polymer clay glue. Apply a small amount to the surfaces and press firmly. For sealing, use varnish or Mod Podge to protect and enhance the finish. Apply thin coats, allowing each layer to dry before adding more. Avoid using adhesives on unbaked clay. For extra durability, seal after painting or embellishing. Properly sealed pieces are water-resistant and long-lasting. Experiment with adhesives to combine baked and unbaked elements for unique designs. Always follow manufacturer instructions for best results.
Color Mixing and Customization
Sculpey Oven Bake Clay offers endless customization options through color mixing. To create unique shades, knead together small portions of different colors until fully blended. Start with a base color and gradually add smaller amounts of another hue to achieve the desired tone. For consistent results, ensure the clay is at room temperature and well-conditioned before mixing. Note that the color may darken slightly after baking. Experiment with layering and marbling techniques for intricate designs. Use white clay as a base for pastel shades or black to deepen tones. This versatility makes Sculpey ideal for personalized, professional-looking projects.
Advanced Techniques for Professional Results
For professional finishes with Sculpey Oven Bake Clay, try advanced techniques like gradual baking, where you bake in short intervals to monitor progress. Use a toothpick to test firmness without overbaking. Achieve smooth surfaces by sanding baked pieces with fine-grit sandpaper while still warm. Enhance details by layering thin sheets or using texture stamps. For intricate designs, bake in stages, allowing each layer to cool before adding more. Experiment with metallic powders or mica for a luxurious look. These methods ensure crisp, polished results that elevate your creations to a professional level.